2 - Getting a Codecov account and uploading coverage
Pull the latest from main and create a new branch step2
git checkout main
git pull
git checkout -b 'step2
Before we continue, let’s create an account and set up our repository on Codecov
Create a Codecov account
Create an account on Codecov through our signup page. We will Configure Codecov for our demo repository in the next steps, for now just make sure your groups and repositories are syncing.
Set up the Team Bot, make sure the Role allows the team bot to comment on PRs.
Now that we have set up our Codecov accounts, let’s upload coverage reports.
Add the Codecov token
For more information on tokens, see the documentation.
Click Configure on our demo repo, select Using Codecov's CLI. We will only do Step 1 since we are using GitLabCI for this demo.
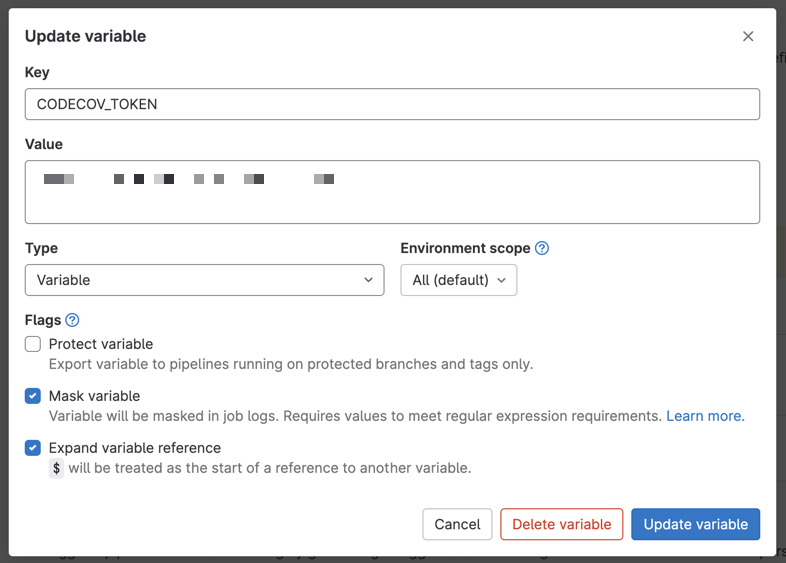
To add repository token as a secret to your CI Provider, from the demo repository's page on GitLab, go to Settings -> CI/CD. Under Variables, Add Variable to add your token as shown below.

Select Add variable to save.
Create GitLabCI pipeline
We need to create a configuration file for GitLabCI. The CI workflow below will checkout the code, install requirements, run tests, and upload the coverage reports to Codecov.
Add the following code to a new .gitlab-ci.yml file at the root of your project
api:
  image: python:latest
  script:
    - pip install -r api/requirements.txt
    - pytest --cov api/
    - curl -Os https://cli.codecov.io/latest/linux/codecov
    - chmod +x codecov
    - ./codecov upload-process -t $CODECOV_TOKEN
Commit the changes and run the CI workflow
Let’s commit our code and open a pull request. Run
git add .
git commit -m 'step2: upload coverage reports to Codecov'
git push origin step2
Next, go to the demo repository on GitLab and open a merge request, which will run our GitLabCI pipeline for the first time.
When opening merge requests, be sure to select your own repository as the target branch, orset your project's default target branch
Token not foundYou should expect to see
['info'] -> Token found by environment variables
in the logs in your CI. If you are not seeing this, make sure that you have added the variable and that the CI pipeline has access to the variable.

You will see status checks on the MR from the CI. You can click on them to see the progress of the CI/CD. Once complete, you will receive status checks and a comment from Codecov.

codecov/patch and codecov/project status checks
codecov/patch and codecov/project status checksOne of Codecov’s core uses is getting code coverage information directly in a developer’s workflow. The status checks shown above are part of that.
- The
patchcheck is used for code changed in a PR, this is enabled by default. - The
projectcheck is used to maintain a coverage percentage across an entire codebase, we will add this check in the next step.
A more mature repository may have a strict project percentage, while a project new to code coverage may only expect new code to be well-tested (patch coverage). We will be setting some of these values in this section, but you can read more about status checks here.
If you go to the project on Codecov, you will notice that the dashboard is blank. This is because no coverage information has been uploaded onto the main branch. We can fix this by merging the pull request!
Merge the MR on GitLab and wait for the CI/CD to complete.
When opening merge requests, be sure to select your own repository as the target branch, orset your project's default target branch
Updated about 2 months ago